Wednesday, May 23, 2012

Chicken Salad Sandwiches

Tonight when I made Chicken Salad Sandwiches for dinner,
our 4 yr old smiled and said, "You can make this for dinner again if you want, Mom!" 
Ha! I love it. 

I used this recipe that I made up:

Chicken Salad

4-5 Chicken Breasts, grilled and chopped
2 Celery Stalks, washed and chopped
1/3 cup Mayonnaise
2 Tbs Ranch
1/8 cup Sweet Relish
1/2 tsp Mrs. Dash Original
2 tsp Herbes de Provence 
1/2 tsp Black Pepper

My uncle taught me his trick to making the best grilled chicken... Its simple, just place your frozen chicken breasts on the grill, over super low heat- the lowest your grill will go. Grill for 45-60 min. It takes forever, but it makes a very moist and tender chicken that is SO good!

Mix all ingredients together. Serve over crusty bread, on a bed of greens, sprouts, cucumbers, or even just as it is. 

You could substitute the seasonings for whatever your favorite spices are, just play with it! :)

Enjoy! 

-Sylvie


Tuesday, May 22, 2012

Dark Chocolate Covered Strawberries

Sometimes a girl needs a lil chocolate in her day...
Ok actually a LOT of chocolate in her day.


I LOVE chocolate covered strawberries.
 I try to tell myself that its actually healthy to eat dark  chocolate covered strawberries. I mean there has to be so many health benefits from eating all that dark chocolate and all those strawberries right!? :)

The way I make them is super easy...

For one quart of strawberries (washed and dried of course),
I use one small bag of Nestle dark chocolate chips (1 1/2 cups)
and a blob of shortening (1-2 tsp).
 Microwave for 30 seconds. Stir. Repeat.
Promptly dip your strawberries and place on wax paper to harden.
 If you have extra melted chocolate, 
whip some pretzels out of your pantry and dip those too! 
 Try not to eat them all in one sitting. Not that I would ever do that or anything...

Enjoy! :)

-Sylv

Piglets, Cows, and Ducks

It is so neat to spend time on my parents little farm, 
enjoying all the animals...
I am pleased to have them there to show to the kids, 
without having to clean up after them,
or wake up early to feed them!
 I'd rather make eggs in the kitchen than bring hay to the field. :)
Maybe someday when our kids are grown I'll look for something more to care for. But for now, I think I've enough to care for! :)

-Sylvie

Saturday, May 19, 2012

Mushroom Cupcakes Tutorial

I had some fun with homemade fondant yesterday. 
Using that recipe, I simply rolled it into small balls 
and then rolled those flat out.
I made some real fancy cupcakes from a box mix. ;)
 Then frosted the cupcakes with real fancy frosting from a can, ;)
...and placed a circle of the fondant over top of each cupcake.
 To make them look smoother, I dabbed them with just a sniff of water and smeared it around.
Then I drew dots and outlined them using my food writer markers.
 Fun, yummy, and cute lil cupcakes, don't you think?!
 Our baby must think so... this morning, she went sneaking into the kitchen, pushed a chair up to the counter, and ate one before we noticed! 
Enjoy!

Have a good weekend! :)
-Sylvie

Marshmallow Fondant Tutorial

I love the look of smooth fondant in place of frosting.
I don't love the flavor of the fondant you buy at the store!

Did you know that you can easily make your own fondant at home, that even tastes good?! :)
It's very simple...

All you need is powdered sugar and mini marshmallows.
Put some marshmallows into a microwave safe bowl, and microwave on high until the marshmallows are warm and melty.
I used about 2 cups, and microwaved them for 30 sec.
Mix powdered sugar into the melted marshmallows until it dries up just enough that to turn it out onto a nonstick surface dusted with powdered sugar(hint: I used a piece of parchment paper taped to the counter. It makes cleanup super easy!). 

Work more powdered sugar in until it is not sticky.
It works well to fold it over and over, adding sugar into the middle now and then.
It should be like a stiff play doh when it is done.
 That's it! 
Now you can roll it out into a sheet and lay it over a cake, or shape it into smaller shapes to add onto treats.
You also can use a dot of gel food coloring to dye it, working the dye in the same way you worked the sugar in while making it.

If you want your fondant to look smoother/ glossier, just dab some water on it with your fingers once it is in your cake.

Have fun!

-Sylvie

Thursday, May 17, 2012

Baby Girl Gift DIY

I am super cheap frugal, 
and I hate spending $$$$ on things 
I could just make from my stash.  

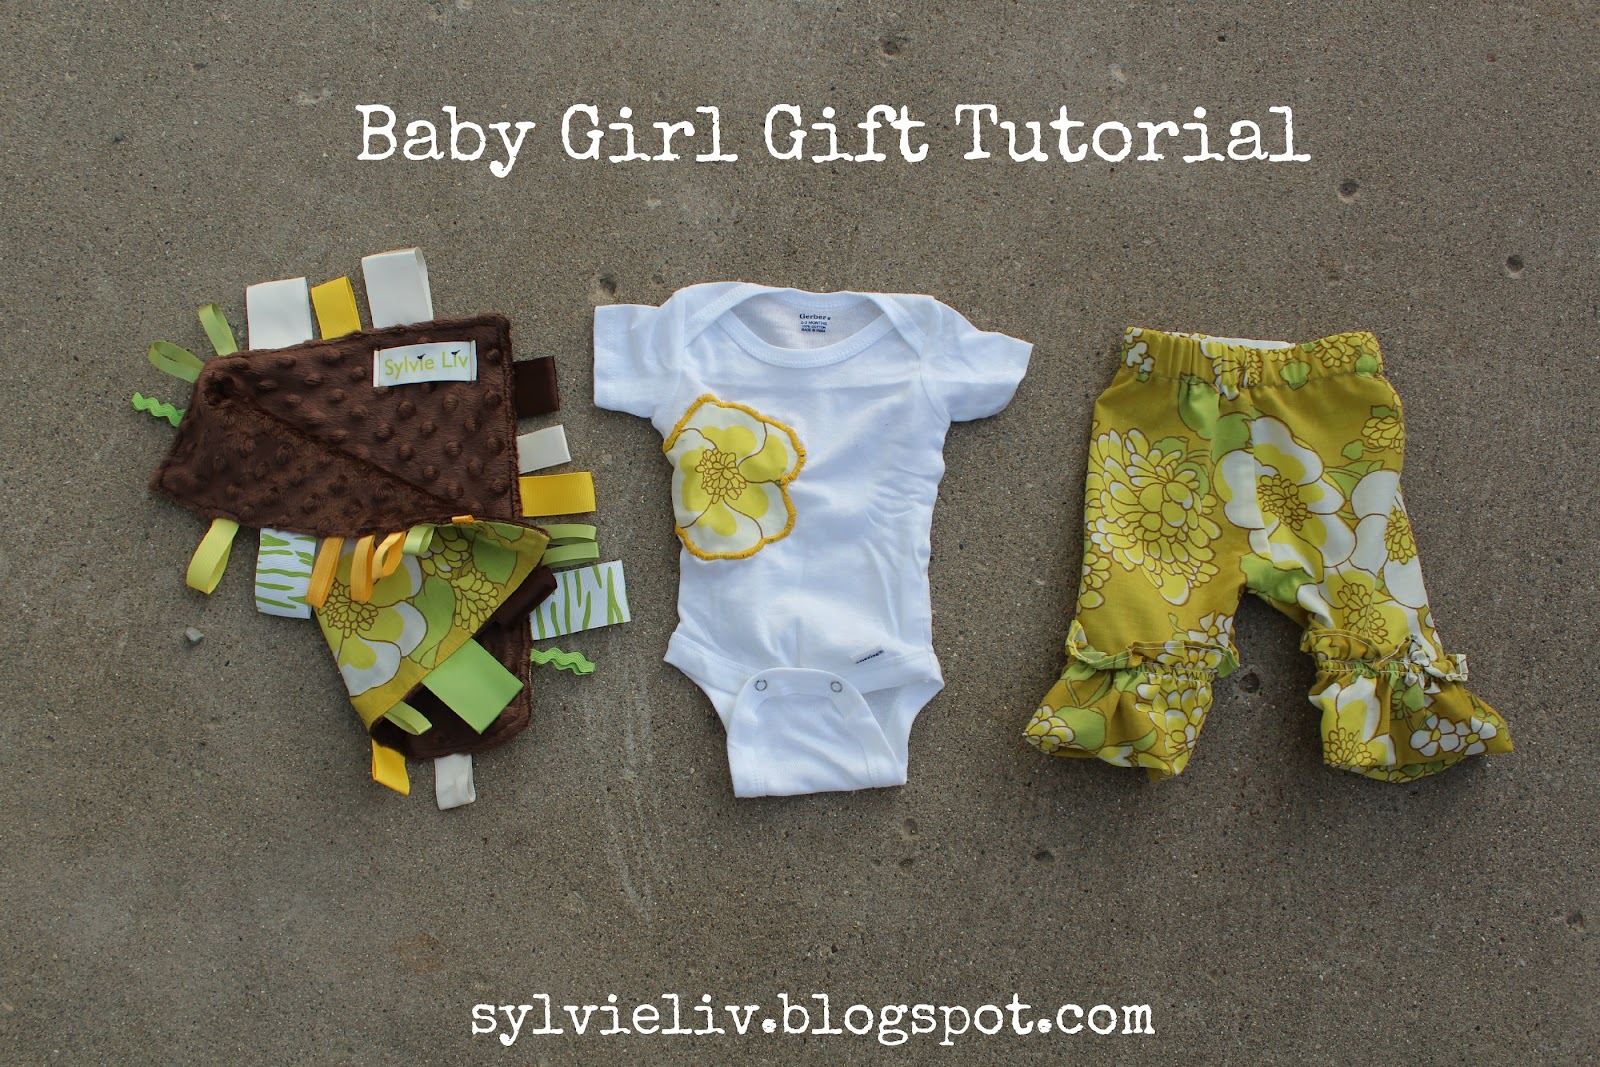
So today I made a baby gift for my friend 
who is due this summer with a baby girl...

I used a onesie from target, a little pair of pants from the closet for a pattern, a vintage sheet, a piece of soft fabric from my scrap bin, some ribbons, and a short piece of elastic.


Baby Girl Pants Tutorial

 First, I stitched up the ruffle that was around the 
edges to make it more of a bubble than a ruffle. 
 Use the pants to cut out two 
identical pattern pieces like the below image.
(If your sheet doesn't have a ruffle, 
Just use the existing hem for the bottom hem!)
 Open the two pieces up, and pin them, right sides together 
from the waist down to the corner where the leg starts. 
Now sew or serge where you pinned.
 Now turn the pants so that the seams you just made line up on top and bottom. Pin the inside of the legs, 
and sew or serge along the pins. 
I use a stitch on my sewing machine that looks like the letter E.
Now turn the pants right side in and
trim the top with pinking shears (or serge along the edge).
Trim the front of the waist slightly shorter.
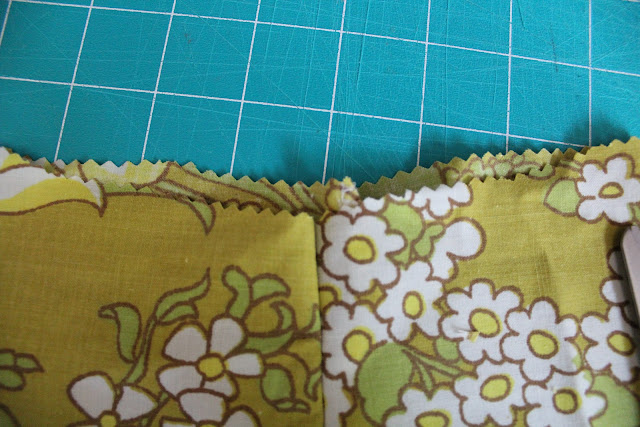
 Using your baby pants again as a guide, 
fold the waist inward to match the height and iron.
(iron all your seams while your at it, it looks good!)
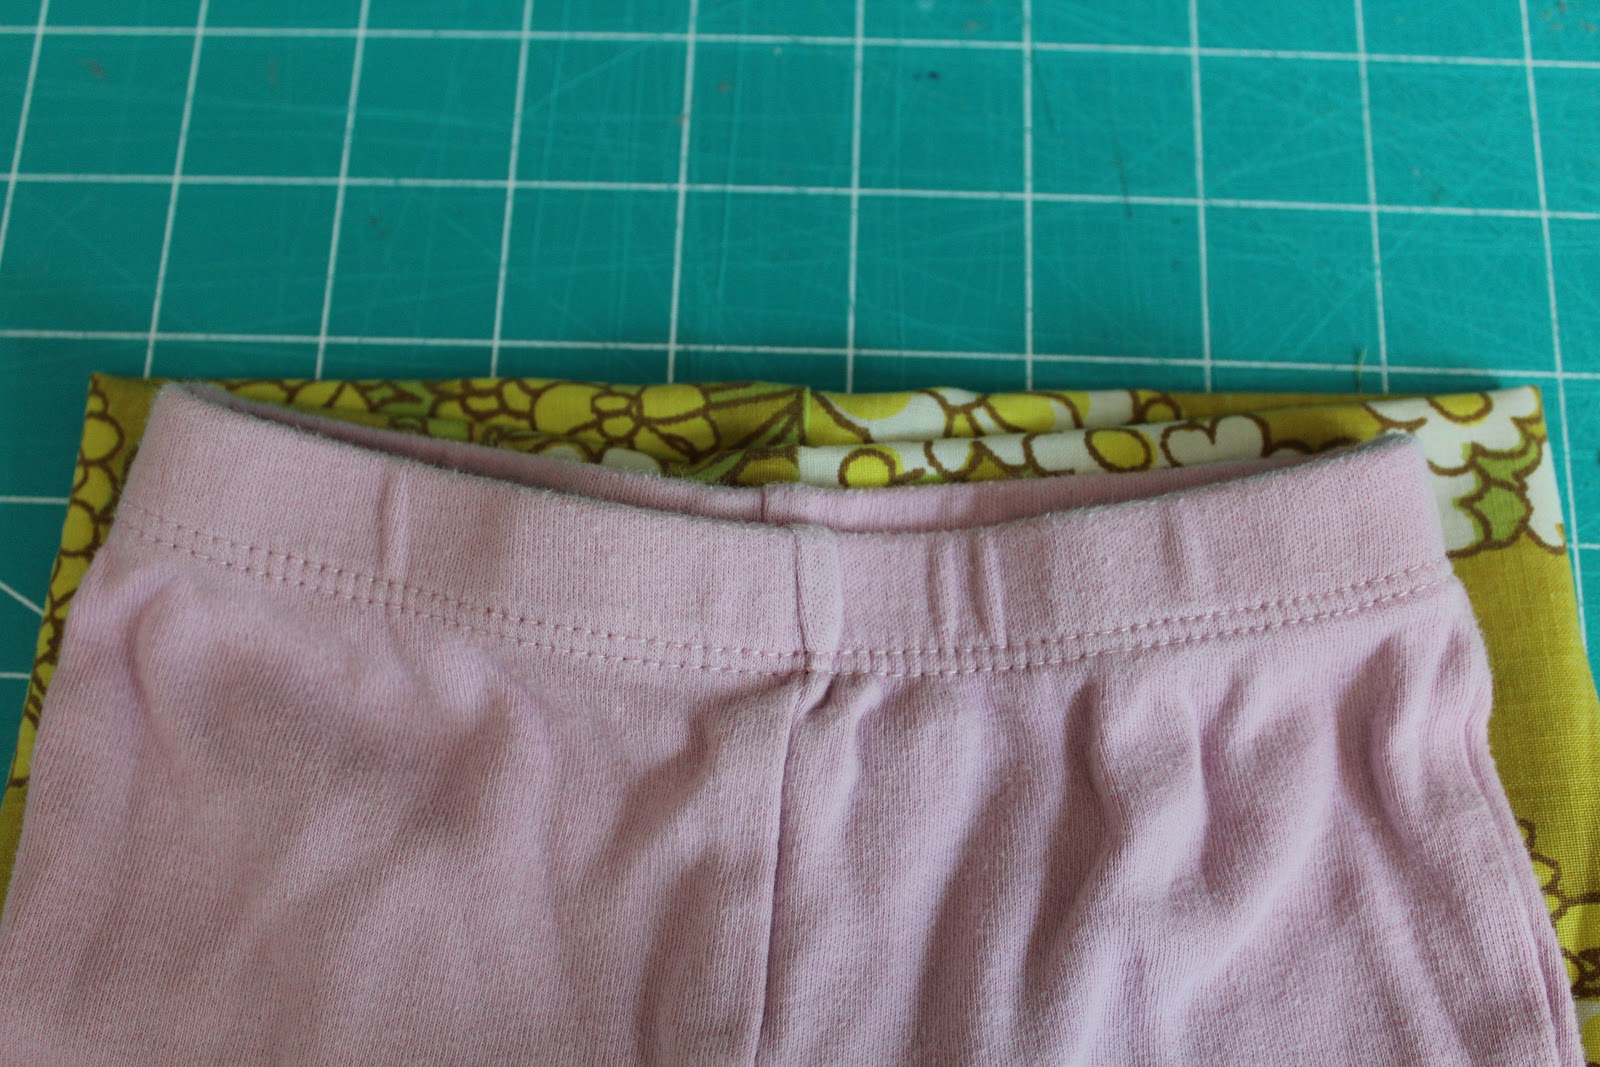
 Now sew the waist in place leaving an opening 
to put the elastic into. I used 1" elastic, 
so I stitched the waist fold a little bit bigger 
than 1" down from the top. 

I used the band on my pattern pants 
to determine the length of elastic I cut.
Pull the elastic through using a large safety pin. 
 Laying the elastic flat on top of itself, 
sew it together into a circle using a zigzag stitch.
Finish sewing the waist shut.
Add a brand tag onto the back if you have one.
 Your pants are finished! :)

Applique Baby Tee Tutorial

To add to the onesie, I cut two flowers from the same vintage sheet and pinned them where I wanted them.
Then, using a buttonhole(on the front) or a zigzag(on the back) stitch on my sewing machine, 
I just stitched around the edges of the flowers. 

 That's it for the shirt!

 I also made a snugly using a tutorial found in this book.


Happy Sewing!
If you have any questions, please ask!

Wednesday, May 16, 2012

Custom Bulletin Board

There is so much you can do with a roll of cork. 
Here is a simple an quick project I did using some...


Materials:
Cut your cork to size on a cutting mat using your Xacto
 (I cut mine into a small rectangle).
Use the pins to hang it on the wall:
I also used pins to hang some doilies on one side.
That's all! Now I have a nifty little spot to hang my remembers!
You can buy the felt on cork wall flowers in our shop.

Have a good day! :)

-Sylvie


linky-party
Linked to somedaycrafts and creationsbykara.