Thursday, October 2, 2014

An End of Summer Pasta... Use Up Those Garden Vegetables!

In the end of summer, there seems to always be an abundance of a few of my favorite things... Cucumbers, tomatoes, and dill from the garden. The counter was heaping; something had to be done! So I browsed around the interwebs, compiled a bunch of recipes that I read, and whatdoyouknow! A new summer favorite!!
We may or may not have eaten this all by itself as a meal.
What can I say!? It's just that good.

Summer Vegetable Pasta with Dill Vinaigrette

Ingredients:
1 lb Bowtie Pasta
1 pt cherry tomatoes; halved 
2-3 cucumbers; peeled and diced
1/2 cup feta cheese crumbles
1/4 cup pitted kalamata olives, sliced

For the vinaigrette:
3/4 cup Olive Oil
6 Tbsp Red Wine Vinegar
2 tsp White Sugar
1 Lg Clove Garlic; Minced
A few sprigs of Dill Weed; Chopped
1 1/2 tsp Dried Oregano
1/2 tsp Salt
1/4 tsp Black Pepper

Directions:
Boil pasta according to package directions. Drain pasta and rinse under cold water. Add tomatoes, cucumbers, feta, and olives. In a separate bowl combine your vinaigrette ingredients. Mix well and pour over salad. Enjoy!


Tuesday, September 9, 2014

Motherhood Poem


Artwork of my angel by Marita, of The Family Life.

In This Stage We Hurry! Hurry! Hurry!

“Wake-up-I-wan-nummies!” she shouts in my face,
And I roll out of bed, feeling like a disgrace.
How can it be morning? I can’t help but wonder
“I AM HUN-GY!” she shouts, her voice is like thunder.
I just wiped last night’s messy meal off that smile,
Now it’s time for breakfast, in this two year old style.
I reach for my glasses, but of course they aren’t there
They’re across the room in the baby doll chair.
I scoop up the baby, and stumble downstairs
I glance at the mess, and I try not to glare,
“I wan-oat-mea!” she yells, and pulls it off the shelf
Hot oatmeal it’ll be, I then think to myself.

She then takes what I make, spits it out on the floor
While I clean it all up, races out the front door.
She heads straight for the street; our drive is her highway, 
She’s in my high heels, doing it all “my-way.”
I ask her please stop and she only runs faster;
In this little game, she is my master.

Her inside out jammies, they are nearly threadbare
I hope that the neighbors don’t see her out there.
She giggles to herself, as she gets near the road.
Mother instincts set in, setting off panic mode.
I set down the baby, and then race for the street.
At the end of the drive, the wild toddler I meet.
I grab hold of her wrist, she roars like a monster.
I hurry up the drive, face red as a lobster.
She wiggles and jiggles, she is oh so stubborn.
I wonder- but why? Does she have to relearn
Every day of the week, what’s right and what’s wrong.
My patience is short, and her energy long.

We shuffle inside, where the baby does cry.
“I can’t see my mommy, and I do wonder why!”
We flop down on the couch, to feed baby and then
The reality of this whole Monday sets in.
There are doctors and dentists and teachers to see.
I cry and I wonder, is this really on me?
The circus of baby, toddlers, school children too?
How will I handle this? Just what will I do?
One moment at a time is all I will think on
And I turn round to see my wild two year old gone.

I jump up off the couch, again set down the baby.
Where did the child go to? The fridge, or bath maybe?
“I ‘m texthting.”  she whispers, and holds up my phone.
She’s called Auntie Janette, in an earlier time zone.
I sigh and I pray that Auntie didn’t hear it.
I grab up my cell phone, and vow to stay near it.

Diapers, clean outfits, hairdos, shoes, and brush teeth,
On the surface we’re clean, but don’t look underneath.
For the days in the dirt, and the grass and the dew,
Washing them right spotless is not easy to do.
My gel covered hand scrubs around on his head,
And out to the bus kindergartener is lead.
At least it’s one less to look after today,
I tell him “Have fun!” and I try not to say,
Be careful of bullies, strangers, and all scary stuff,
I worry for him so, will my prayers be enough?
Before I can shed even just one small tear,
I am side-tracked; my toddler I swear was just here!

I race around shouting “now where did you go?”
Her every location I sure wish to know.
“I made you a picture!” she smiles up at me,
Blue crayon on the wall, “Lovely picture I see.”

Everyone is buckled; I back up the car,
I hope that the doctor says we’re all up to par.
“I peed in my undies!” toddler shouts from the back,
Another dirty pair we will add to the stack.                         
I call up the doctor, to tell them I’m late,
“No problem!” they say, “But don’t come in today.”
“We’ll have you reschedule, now when’s a good day?”
A good day, why never! I think to myself,
In fact I’m not worried about any one’s health!
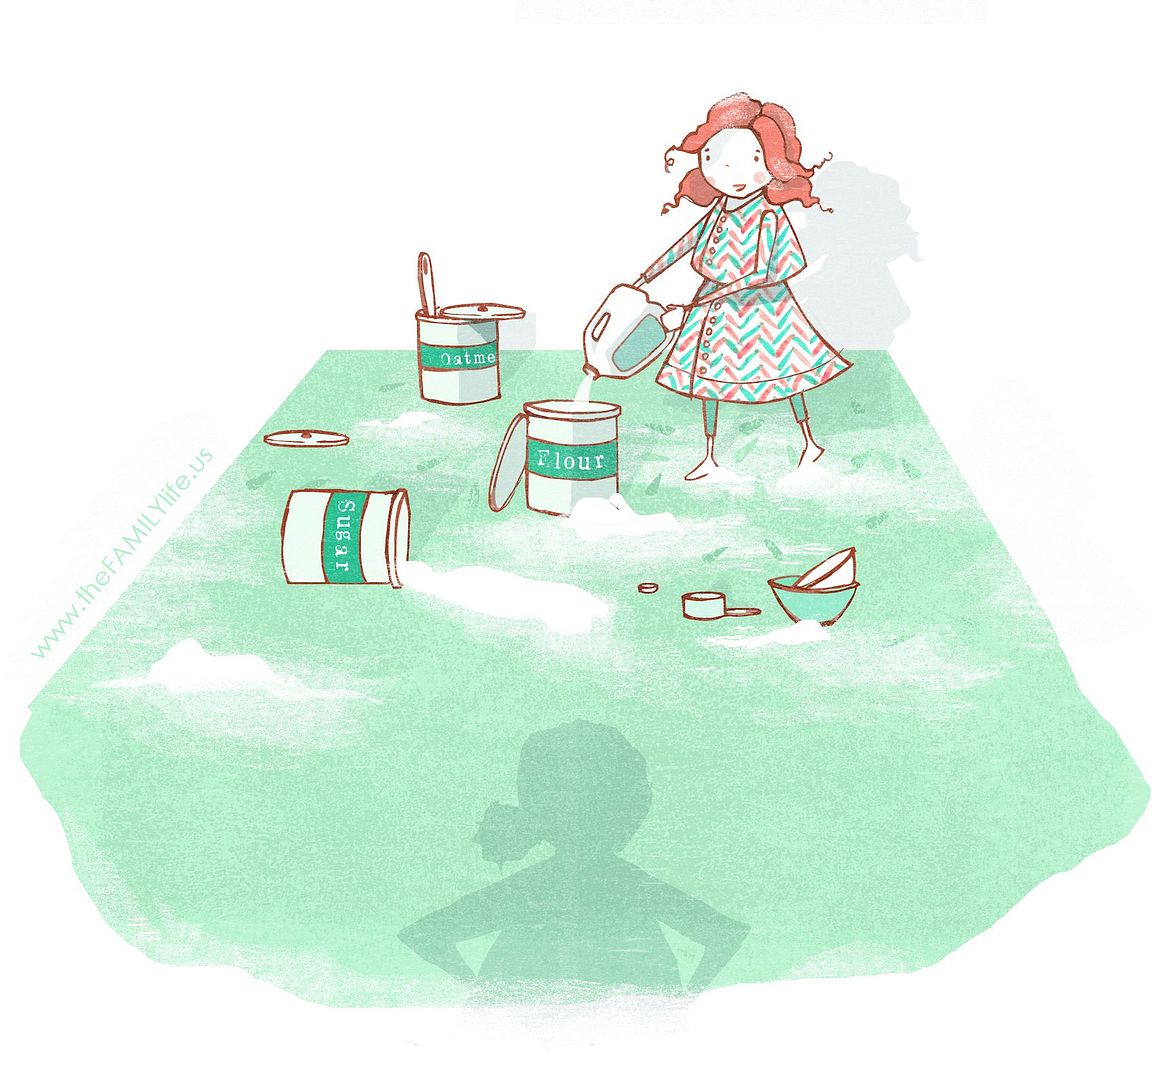
The day speeds on by quickly with no shortage of messes,
There is flour on the floor and food coloring on dresses.
The toothpaste is gone, I hope she doesn’t get ill,
Although that may give me a rest from her still.

As I tuck them all in for the night in their beds,
And place a quick kiss on each of their heads,
“I wub you.” she says and she closes her eyes.
I feel so much guilt, for how could I despise?
All the crazy wild madness and all of those messes,
They make me so tired for to me they are stresses.
But to this little angel they’re all about learning
And growing much bigger, for which she is yearning.

Opportunities are never missed,
I think as that last cheek is kissed.
And if that crazy little one was to be taken,
How boring would be our home- unshaken.
For she is the color, the fun, and the life,
That brightens the days for this busy wife.

---------------------------------------------------------------------------------

Yes, this is based on real life. I'm sure you mothers can relate! 

Marita drew the adorable little cartoon at the top, and I wrote the poem. She draws lots of darling images based on experiences in motherhood. Every mom should check out her siteThe Family Life!


A few of my favorites of hers are this one, this one, and this one. I can totally relate to all of them! 

Thanks for stopping by!
Sylvie

P.S. To read some of my other writings on real life, click here, here,or here.

Friday, August 8, 2014

Easy DIY Bike Art Decoration: A Great Gift Idea!

I call this cheater art. You don't have to be any sort of creative or artsy to make this adorable decoration! 
Remember the telephone and flower ones I made?
Well, I followed the same instructions to make this bike art.
These make such a quick, easy, and affordable gift for any person in your life! Just choose an image that they would like, and they are sure to be happy with it! 

Have fun!
Thanks for reading!
Sylvie

Tuesday, July 22, 2014

Mango Coconut Popsicle Recipe: A Dairy Free Gluten Free Vegan No Sugar Added Dessert!

Phew! That may have been my longest title yet! Anyways, you guys! These are soooo good! And they have NO SUGAR ADDED!!
The only sugars are natural fruit sugars. Oh and did I say they only have 3 ingredients!? So. easy. This is our new favorite summertime dessert for sure. My kids love them. 
You've got to try them! You will need:

16 oz unsweetened coconut milk (found in the Asian food section at most grocery stores)
16 oz 100% Mango Juice
1 tsp Vanilla extract
Whisk your ingredients together...
Pour into your Popsicle mold.
For real. That's it.
Put sticks in them,
and shove them in the freezer.
Give your kids the lil bit of leftover goodness.
Try not to take them out and eat them before they freeze! ;)
We've been eating these almost every day. Seriously. Yum.

Enjoy!
Sylvie


***UPDATE: We've found that these are even better if you add a banana and throw them in your blender before pouring into the molds! Try it!


Tuesday, July 8, 2014

Weaning and Depression

I didn't know that weaning my baby would effect my brain so much. I had already weaned a few babies from breastfeeding, without any ill effects on me. 
My baby was over a year. I loved nursing her. She loved it too. But she was getting older. She could drink cow's milk now. And I was starting to feel run down, needing a full night's sleep. It was time. I started to wean by stopping the night time feedings. It was so hard. She was so sweet, begging me to nurse. I started to feel a little guilty. 
Then, the guilty feelings were masked by a fog that hit me. My days become very long. My daily tasks became larger than life. I no longer had patience for my little ones... Or for adults in my life either. I felt mostly emotionless, unmotivated, tired, and lazy. I knew that these feelings were not normal for me. I remembered that I normally had much more energy, happiness, and patience with my family. I normally cared if the house was a mess, but now things began to slip. And I didn't care.
Then I remembered reading about Joanna's experience with depression and weaning. I realized that my fog had started when I started to wean my sweet little baby. It was encouraging to me, to realize this wasn't the new me, I would get better. Realizing what was going on, I hurried up the weaning process. It was hard for both of us and some days I wanted to just forget it and nurse her again.
But somehow I didn't give in. And slowly my days got better. After about 3-4 weeks of no nursing at all (and about 2.5 months total), I felt happy again. I felt like I could handle my life again. What a relief! 
Depression and weaning is not something that is well known or talked about much. I am sharing my story here today, because I feel it is something that needs to be known among mothers. If I can help even one mother, I would be so glad! 
If you are experiencing post postpartum depression symptoms while weaning your baby, please know that you are not alone!! Hang in there a little longer until your hormones level out! Do not be afraid to talk to your doctor about it! Sometimes our brains need medicine to help us through rough patches, and that is perfectly ok. 
We must take care of ourselves so that we can take care of our babies. 
In my lowest points, I found that grapefruit oil actually worked well! I used it in my diffuser, or I put a couple drops on my shirt. Another thing that helped was to cuddle my baby- a lot. It seemed to help with some of the guilty feelings I was having for not nursing her. It also helped me to talk about my emotions. I have a very large support group of family and friends, and that was so helpful! With all of these things I was able to hang in there through it all with out any medicine; but if it had lasted any longer I would have for sure headed back to my doctor.

If any of you are experiencing this and have any questions, please feel free to leave a comment or email me directly! 
(I am not a doctor, and I am only speaking from experience. Please consult with your doctor if you are feeling symptoms of depression!)


Thank you for reading!
Sylvie

Wednesday, June 18, 2014

Guest Post: How to Properly Paint Laminate Furniture

Today we have a guest post by Jennifer Riner from . She will be teaching us how to properly paint laminate furniture. 

Take it away, Jennifer!

Source: Lukas Machnik


Some do-it-yourself enthusiasts mistakenly assume their painting and restoring efforts can only be applied to wood furnishings. Luckily for laminate owners, painting over plastic is possible and relatively simple.
To detect laminate, closely observe the coating. Laminate furniture is covered by a thin layer of clear plastic. Unlike wood, laminate surfaces cannot be sanded down to absorb a fresh coat of paint evenly. Therefore, stylists looking to restore laminate pieces should complete the following steps for best results.

Clean and Repair
Make sure surfaces are clean of any debris or dirt by scrubbing with antibacterial solutions or soap and water at least twice before painting. Use wet cloths to remove any soap residue and remove ingrained dirt with small picks or toothbrushes. Use a cloth to dry surfaces completely before priming.
Dented or damaged laminate can be repaired before painting. Heat a traditional clothes iron to medium heat and cover the dent with a few drops of water and an old cloth. Position the iron onto the damaged spot and let sit for 15 seconds or until the dent pops back out. Wait until the surface cools before continuing with priming.
To repair chips and divots, apply wood filler into flaws and allow to dry overnight.

Prime Carefully
Pick cool, dry rooms to use as work spaces for renovating laminate furniture. Homes in warm climates tend to trap humidity, causing paint to bubble – especially on challenging surfaces such as laminate. Opt for air-conditioned spaces and don’t set furniture in direct sunlight during the process.
Since laminate cannot be sanded, priming is a vital step in ensuring top coats adhere properly. Otherwise, paint tends to visibly rise after drying. Use primers to create surfaces that won’t scratch, peel or emit odors.
Some restoration experts recommend using shellac-based primers, as they tend to stick to surfaces easily. Apply one to two coats of primer, precisely covering all spots evenly. Oil-based primers are also effective at casing laminate surfaces for optimal effects.

Paint and Seal
After allowing ample time for primers to set – preferably overnight – gather angled paintbrushes and foam rollers. Angled brushes help paint get into hard-to-reach edges and corners. Smooth over surfaces with foam rollers for a mark-free finish. Use two coats so faux-wood finishes on linoleum stay concealed. Remember to lay tarps down before painting to avoid messes that could potentially ruin carpets and hardwoods.
Seal with polycrylic or wax protective finishes. Brush one to two coats on top of dry paint, allowing a few hours in between each coat for pieces to dry.
Laminate can even be distressed to match more rustic, shabby-chic interiors. Sand very lightly, careful not to break through paint and damage laminate. Or, paint over with a crackle medium and then cover in latex paint. Use an opposite hue to display a noticeable contrast between the latex and the crackle. Again, lightly sand to fit with more natural, weathered interior styles.

Don’t throw away or look past perfectly built dressers and chests just because of their plastic surfaces. They can be primed and painted to fit any room and color scheme, as long as the proper preparations take place to make sure paint sets correctly.

+++++++++++++++++++++++++++++++++++

Thank you Jennifer! I will be trying this process out on my bookshelf... I will be sure to share the before and after pics with y'all once it is done! 

Have a good day!
Sylvie


Tuesday, March 25, 2014

DIY Anthro Inspired Horse Print Pillow With Flowers & Feathers


I was looking for a unique design for a pillow for my Mum...
 When I came across this Anthropologie Print, I couldn't wait to make it into a pillow!

I first gathered up a bunch of flowers I made- some of these, these, these, these, these, these, a few felted balls, and some small feathers.

Then I used pencil to lightly sketch the horse onto a piece of fabric- using the image as a reference. I traced over it with black fabric paint and a small paint brush. I sewed a piece of felt over the horse's mane, and then used this tutorial to make a pillow sham with it. 

Then I glued the feathers onto a piece of felt (sticking down off it) and then glued the flowers on top using hot glue.  I used hot glue to attach the felt with flowers to the felt on the pillow cover. That's it! 
I already had the flowers done and in my stash, so this project only took me a couple hours total! Now I'm dreaming of other animals I could do with a flower crown. :)

Have a great week!
Sylvie

Wednesday, March 12, 2014

Arrow Baby Blanket DIY

Darling little baby nook
That soft cream blanket on the side of the baby crib there?
You can make it for just a few dollars!!!

First, buy 1.25 yrds cotton gauze fabric and hem it to make a blanket, like this gold dot one I made here.

Then lay your fabric on newspaper, wax paper, or some smooth surface you don't rightly care about. Using a Sharpie permanent marker, sketch arrows onto the gauze where you'd like.
Then trace the arrows over a few times. This will cause the ink to bleed through so you can see your print from the other side of the blanket as well.

Have fun with different shapes and colors!
Have the best day ever!

Sylvie

Patchwork Puppy Pillow Anthro Knock Off

I made this patchwork puppy pillow for free using scraps!
I want this, but it's $200!! What the heck?? Patchwork Hound Pillow   #anthropologie
Anthropologie had this one for sale for $198!!!!
I feel so thrifty. ;)
First I sketched the puppy on paper. Then I cut out pieces of the paper puppy, tracing the pieces onto fabric before cutting the next piece.
I sewed them together (on sewing machine) as I went along.
I made it for my Mum. I think she likes it. :)

My Grandma saw it and made one of her dog....
I'll have to get a pic of hers for you guys!

Happy Sewing!
Thanks for stopping by.
Sylvie

Science Experiment: Make Oobleck With the Kids!

This winter has been a hard one here in Michigan.
Today was another snow day, after lovely preview of spring weather!
To keep from going crazy, the kids made Oobleck.
I haven't made this stuff since I was a kid... I had as much fun with it as they did! :)

Oobleck:

1/2 cup cornstarch
3/4 cup water

Mix them up in a bowl, and have fun!
It is so neat how it acts like a liquid when poured, yet you can still pick it up! 

I had the kids wear their aprons to keep their clothes clean.
We just scraped it off the counter and into the garbage, and then used water to wipe up the rest when we were done. The bits that fell on the floor swept right up. Pretty easy cleanup!
(Waaay easier than elephant toothpaste clean up!) 

This stuff matches the fresh snow in our yard...
Lets all get out our rain boots and do a spring dance, k?

Thanks for stopping by! :)
Sylv

Monday, March 3, 2014

DIY Natural Chest Vapor Rub Recipe Tutorial For Cough & Congestion

The first time I made this natural vapor rub, it was the middle of the night. 
My toddler was coughing and congested and moaning and miserable. I was desperate.
I mixed up a small bit of this and rubbed it on her feet. 
She kept crying. I rubbed it on her chest and her back. 
She melted into me, finally relaxed. Her breathing calmed. Her coughing stopped. 
She went back to sleep immediately. I couldn't believe my luck.
I have since used this rub countless times, for my entire family. It really works!
I keep it on my nightstand, always. 
It is cheap, safe, easy to make, and pleasant to smell!

Natural Vapor Rub Recipe

2 oz Coconut Oil
20 drops Eucalyptus Oil
15 drops Peppermint Oil
10 drops Lavender Oil

Place coconut oil in a seal-able airtight container. Place coconut oil in direct sunlight until melted into liquid (or microwave for a few seconds until liquid). Stir essential oils into coconut oil. Let harden at room temp.  

To use: Rub a very small amount (1/8- 1/4 tsp) onto chest and/or back to help ease coughs/colds/congestion/ and headaches. OR Place on a tissue or rag nearby face, as to breath it in. 

Tip: Putting a little on a bib works well for toddlers!
Note: I am not a doctor/herbalist, I am simply sharing what works for me and my family. Please do not consider this medical advice. You may want to consult with your doctor before trying this with your family!

Thanks for stopping by!
Let me know how you like it if you try it! :)
Sylvie


Thursday, February 20, 2014

Make Your Own Big Knitting Needles DIY Tutorial

Sorry about the blog silence over here... I was without a computer for too long. Buuut I'm baaack! :) With a tutorial on how to make your own extra large knitting needles (for suuper cheap)! 
Or maaaybe I should say... how to have your wonderful husband make you some extra large knitting needles!?
I picked up two 12" x 1" dowel rods from the craft store, and took a piece of a 1.5" wood from our wood pile.
Mr. Liv cut them to points on his lathe...
and then sanded the dickens out of them. On his lathe.
My little brother cut me two discs off the end of the small log with the band saw.
Drill a small hole through the disc and into the needle. Dab some wood glue on the end. Plop the disc on top, and hammer a finish nail into the end.
Then I rubbed coconut oil into the needles with a rag. I let them sit a while, and then rubbed in a bunch more.
Then I got to work making a chunky cowl scarf. So. fun.
The needles costed me $.85 total!!!
Can't beat that!

Thank you Mr. Liv and Lil Bro, for your expert skills in the shop! 

Thanks for reading!! :)

Sylvie

P.S. You can buy a cowl like this one here, in our shop.